Study Notes
Overview
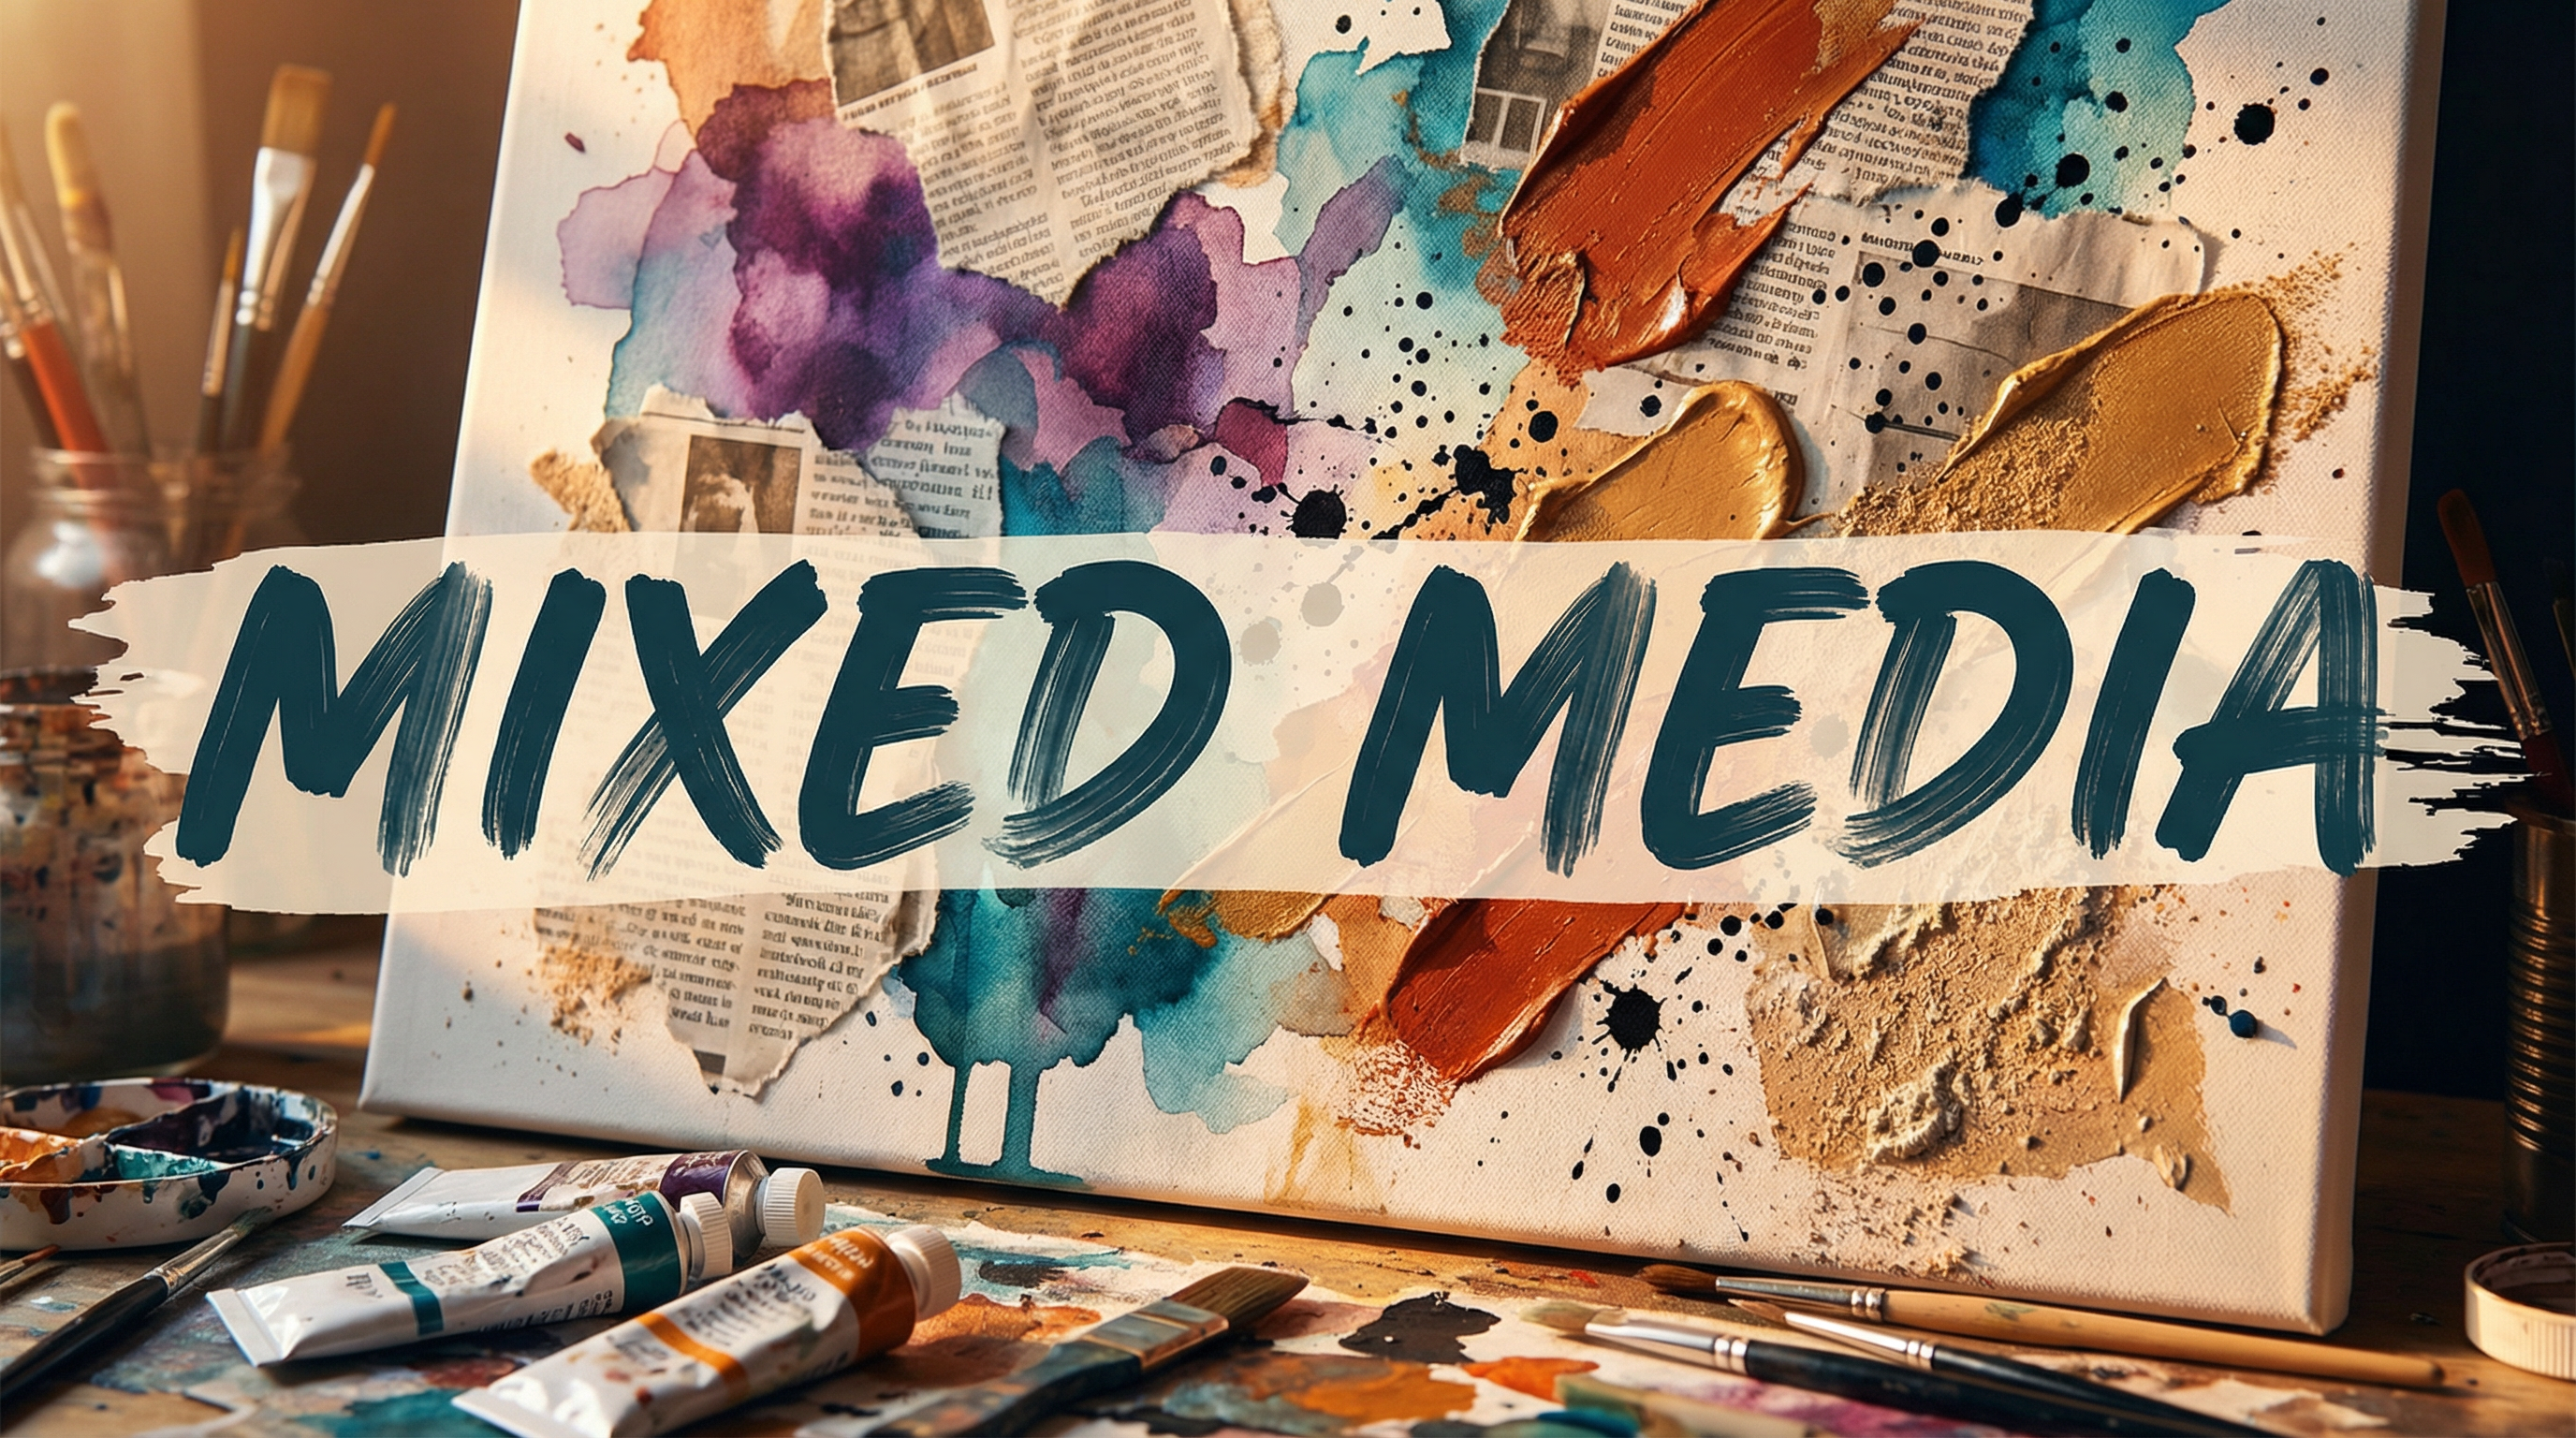
In OCR GCSE Art and Design, Mixed Media (2.5) is not simply about using lots of different materials; it is the purposeful and integrated manipulation of distinct media to achieve specific aesthetic and conceptual goals. Examiners are looking for evidence that a candidate has moved beyond arbitrary combinations and is instead making informed choices that enhance the artwork's surface qualities, create depth, or build conceptual layers. This involves a sophisticated understanding of how different materials interact—such as wet-on-dry processes, digital overlays on traditional mark-making, or the physical and chemical compatibility of substances. Success in this area demonstrates a candidate's technical control, their ability to experiment methodically (AO2), and their capacity to link material choices directly to their artistic intentions (AO1).
Key Knowledge & Theory
Core Concepts
At its heart, mixed media is about creating a visual dialogue between different materials. The core concept is that the final artwork achieves something that no single medium could accomplish on its own. This could be a contrast in texture (e.g., rough, gritty sand against smooth, glossy acrylic), a layering of information (e.g., a photographic image partially obscured by expressive paintwork), or a conceptual juxtaposition (e.g., using fragile, ephemeral materials to explore themes of memory and decay). Candidates must understand the physical properties of their chosen media—their transparency, opacity, texture, drying times, and compatibility—to control these interactions effectively.
Key Practitioners/Artists/Composers
| Name | Period/Style | Key Works | Relevance |
|---|---|---|---|
| Kurt Schwitters | (1887-1948) Dada / Merz | Merzbau, Picture with Light Center | A pioneer of collage and assemblage. Schwitters used found objects and everyday ephemera (tickets, newspaper, fabric) to create compositions that reflected the fragmented nature of modern life. His work is crucial for understanding how non-art materials can be used to build layers of meaning. |
| Robert Rauschenberg | (1925-2008) Neo-Dada / Pop Art | Bed, Monogram, Retroactive I | Famous for his "Combines," which merged painting and sculpture. Rauschenberg incorporated 3D objects, screen-printed photographs, and expressive brushwork into single pieces. He is a vital reference for demonstrating how different visual languages (photographic, painterly, sculptural) can be integrated. |
| Anselm Kiefer | (b. 1945) Neo-Expressionism | Margarethe, The Orders of the Night | Kiefer uses heavy, unconventional materials like lead, straw, ash, and sand to grapple with complex historical and mythological themes. His work exemplifies how material choice can be deeply symbolic and demonstrates the importance of a robust substrate to support ambitious mixed-media applications. |
| Hannah Höch | (1889-1978) Dada | Cut with the Kitchen Knife... | A master of photomontage, Höch deconstructed and reassembled images from mass media to critique politics and gender roles. She is an essential reference for candidates exploring the combination of photographic imagery and socio-political commentary. |
Technical Vocabulary
- Assemblage: A 3D variation of collage, incorporating found objects into the artwork.
- Collage: The technique of adhering flat materials like paper, newspaper, or fabric to a surface.
- Décollage: The opposite of collage, involving tearing away parts of an image to reveal layers below.
- Frottage: A rubbing technique using a pencil or other drawing tool over a textured surface.
- Gesso: A primer used to prepare a surface for painting, which can be mixed with other materials to create texture.
- Impasto: A technique where paint is laid on a surface in very thick layers, usually thick enough that the brush or painting-knife strokes are visible.
- Juxtaposition: Placing different elements or materials side-by-side to create contrast or comparison.
- Substrate: The base or surface on which an artwork is created (e.g., paper, canvas, board).
- Photomontage: A type of collage that is composed primarily of photographs or photographic reproductions.
- Resist: A technique where a substance (like wax or oil pastel) is used to prevent paint or ink from adhering to the surface.
Practical Skills
Techniques & Processes
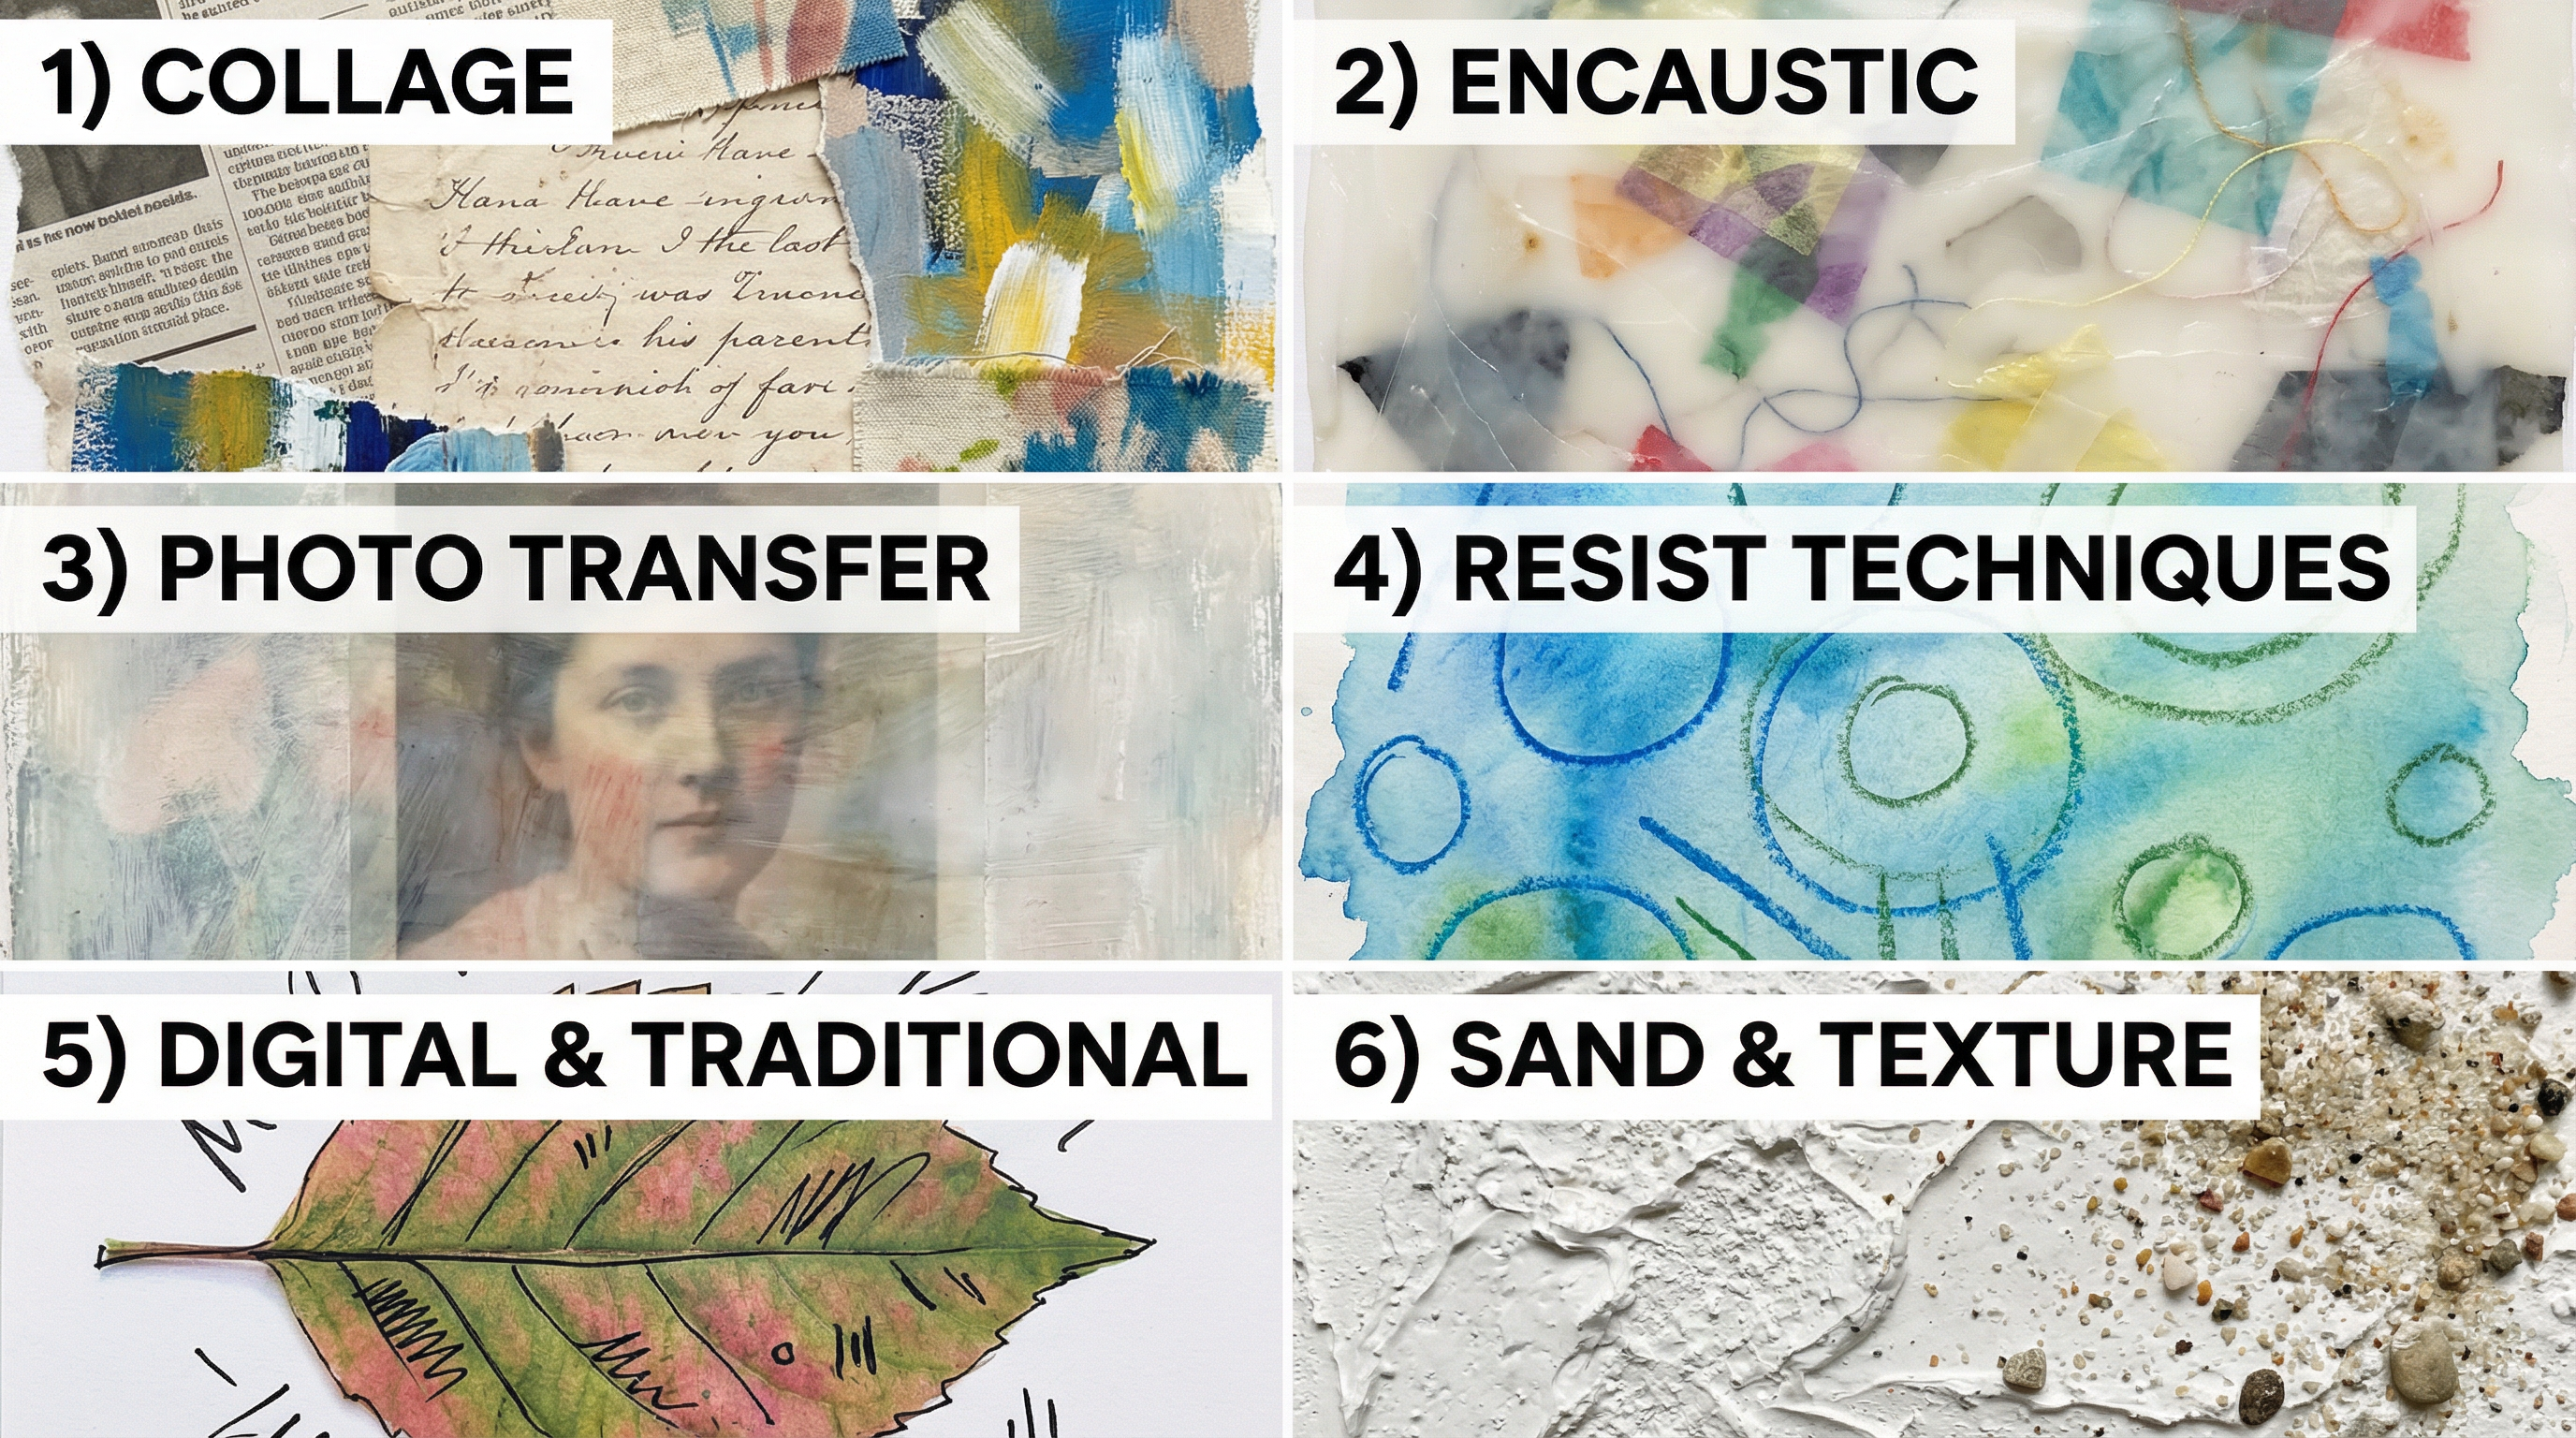
- Layering Wet and Dry Media: A fundamental skill. A common sequence is to start with dry media (e.g., charcoal, graphite, collage), fix it with a spray fixative, and then apply wet media (e.g., watercolour, ink, thin acrylic washes) over the top. Understanding drying times is critical to prevent smudging and muddying of colours.
- Creating Textured Grounds: Move beyond a flat surface. Mix materials like sand, sawdust, or coffee grounds into gesso or acrylic medium to create a tactile ground. This can then be painted over or drawn into, allowing the texture to influence the final marks.
- Image Transfer: This technique allows you to transfer a printed or photocopied image onto a new surface. A common method involves coating the image with an acrylic gel medium, letting it dry, and then using water to rub away the paper backing, leaving the ink embedded in the acrylic film.
- Resist Techniques: Use a waxy or oily substance (oil pastels, wax crayons, masking fluid) to draw a design on your substrate. When a water-based medium like watercolour or ink is washed over it, the resist substance repels the paint, revealing the design underneath.
Materials & Equipment
- Substrates: The choice of surface is critical. For light collage and drawing, a heavy cartridge paper (200+ gsm) may suffice. For wet media or heavy applications, you MUST use watercolour paper (300+ gsm), canvas board, or MDF board to prevent buckling and degradation.
- Adhesives: PVA glue is a versatile adhesive for collage, but it should be used correctly. For thin papers, dilute it slightly with water to prevent wrinkling. For heavier objects, use a thick, undiluted PVA or a stronger acrylic gel medium.
- Paints: Acrylics are highly versatile for mixed media as they are water-based when wet but dry to a permanent, water-resistant finish, allowing for easy layering. Watercolours and inks are excellent for transparent washes.
- Drawing Media: Charcoal, graphite, ink pens, and oil pastels can all be integrated. Be aware of their properties—charcoal will smudge if not fixed, and oil pastels will resist water-based paints.
- Fixatives: A spray fixative is essential for locking down dry media like charcoal or pastel before applying subsequent layers.
Portfolio/Coursework Guidance
Assessment Criteria
- AO1: Develop Ideas: Examiners need to see that your artist research is not just a history lesson. You must show how you have analysed a practitioner's techniques and applied those principles to your own work. Your annotations should explicitly link your material choices to your theme.
- AO2: Refine Work: This is where you evidence your experimentation. Your sketchbook should be full of tests where you try different material combinations. Critically, you must show that you have learned from these tests—selecting the most successful combinations and developing them further. Documenting failures is just as important as documenting successes.
- AO3: Record Ideas: Your sketchbook is your visual journey. It must be thoroughly annotated, explaining your thought process. Why did you choose that material? What effect were you trying to achieve? How did it work out? Use technical vocabulary. Photograph everything, especially 3D or fragile work.
- AO4: Present Work: Your final outcome should be a confident and resolved piece that successfully integrates your chosen media. The materials should feel like they belong together and work in service of a clear artistic intention. The technical execution should be sound—no peeling collage or buckled paper.
Building a Strong Portfolio
- Document Process, Not Just Product: Show your experiments, your happy accidents, and your refinements. A page showing five different attempts at an image transfer, with annotations explaining what you learned from each, is far more valuable than a single, perfect-looking outcome.
- Analytical Annotation: Move beyond description. Instead of "I stuck on newspaper," write "I incorporated fragments of newspaper text to disrupt the painted surface, creating a conceptual layer that references media saturation and its impact on my theme of urban anxiety."
- Link Everything: There should be a clear thread running through your portfolio. Your artist research (AO1) should lead to your experiments (AO2), which are documented in your sketchbook (AO3), and all of this culminates in your final piece (AO4).
Exam Component
Written Exam Knowledge
While Art and Design is primarily practical, the externally set task requires you to demonstrate your knowledge through your practical response and supporting studies. You must be able to articulate your understanding of artists and processes in your annotations. The command words used in the exam paper (e.g., 'Analyse', 'Explore') require you to apply your theoretical knowledge. You will not be asked to write a long essay under exam conditions, but your portfolio itself is a testament to your knowledge.
Practical Exam Preparation
- Deconstruct the Prompt: When you receive the externally set task, break down the starting points. Mind-map ideas and think about which themes lend themselves to a mixed-media approach. For example, a theme of 'Decay' is a perfect opportunity to explore textured, layered, and distressed surfaces.
- Time Management: The preparatory period is for research and experimentation (AO1, AO2, AO3). Do not try to start your final piece too early. Use the time to build a rich body of supporting work.
- Material Preparation: During the timed exam (usually 10 hours), you will create your final outcome (AO4). You should have all your materials, prepared surfaces, and a clear plan ready to go. You cannot introduce new research or experiments at this stage; you are executing the plan developed during the prep period.
Podcast Script
Welcome to Art and Design Unlocked — your go-to revision podcast for OCR GCSE Art and Design. I'm your host, and today we're diving deep into one of the most exciting and expressive topics in the entire course: Mixed Media. Whether you're building your portfolio right now or prepping for your externally set task, this episode is going to give you everything you need to nail it. So grab your sketchbook, get comfortable, and let's get into it.
Mixed Media is topic 2.5 in the OCR GCSE Art and Design specification, and it's genuinely one of the most creative areas you'll encounter. At its heart, mixed media is about combining two or more different art materials or processes in a single artwork — but here's the thing that examiners really want to see: it's not just about throwing everything at the canvas and hoping for the best. It's about purposeful, intentional material choices that serve your theme and concept. That word — purposeful — is one of the most important words in your entire GCSE journey.
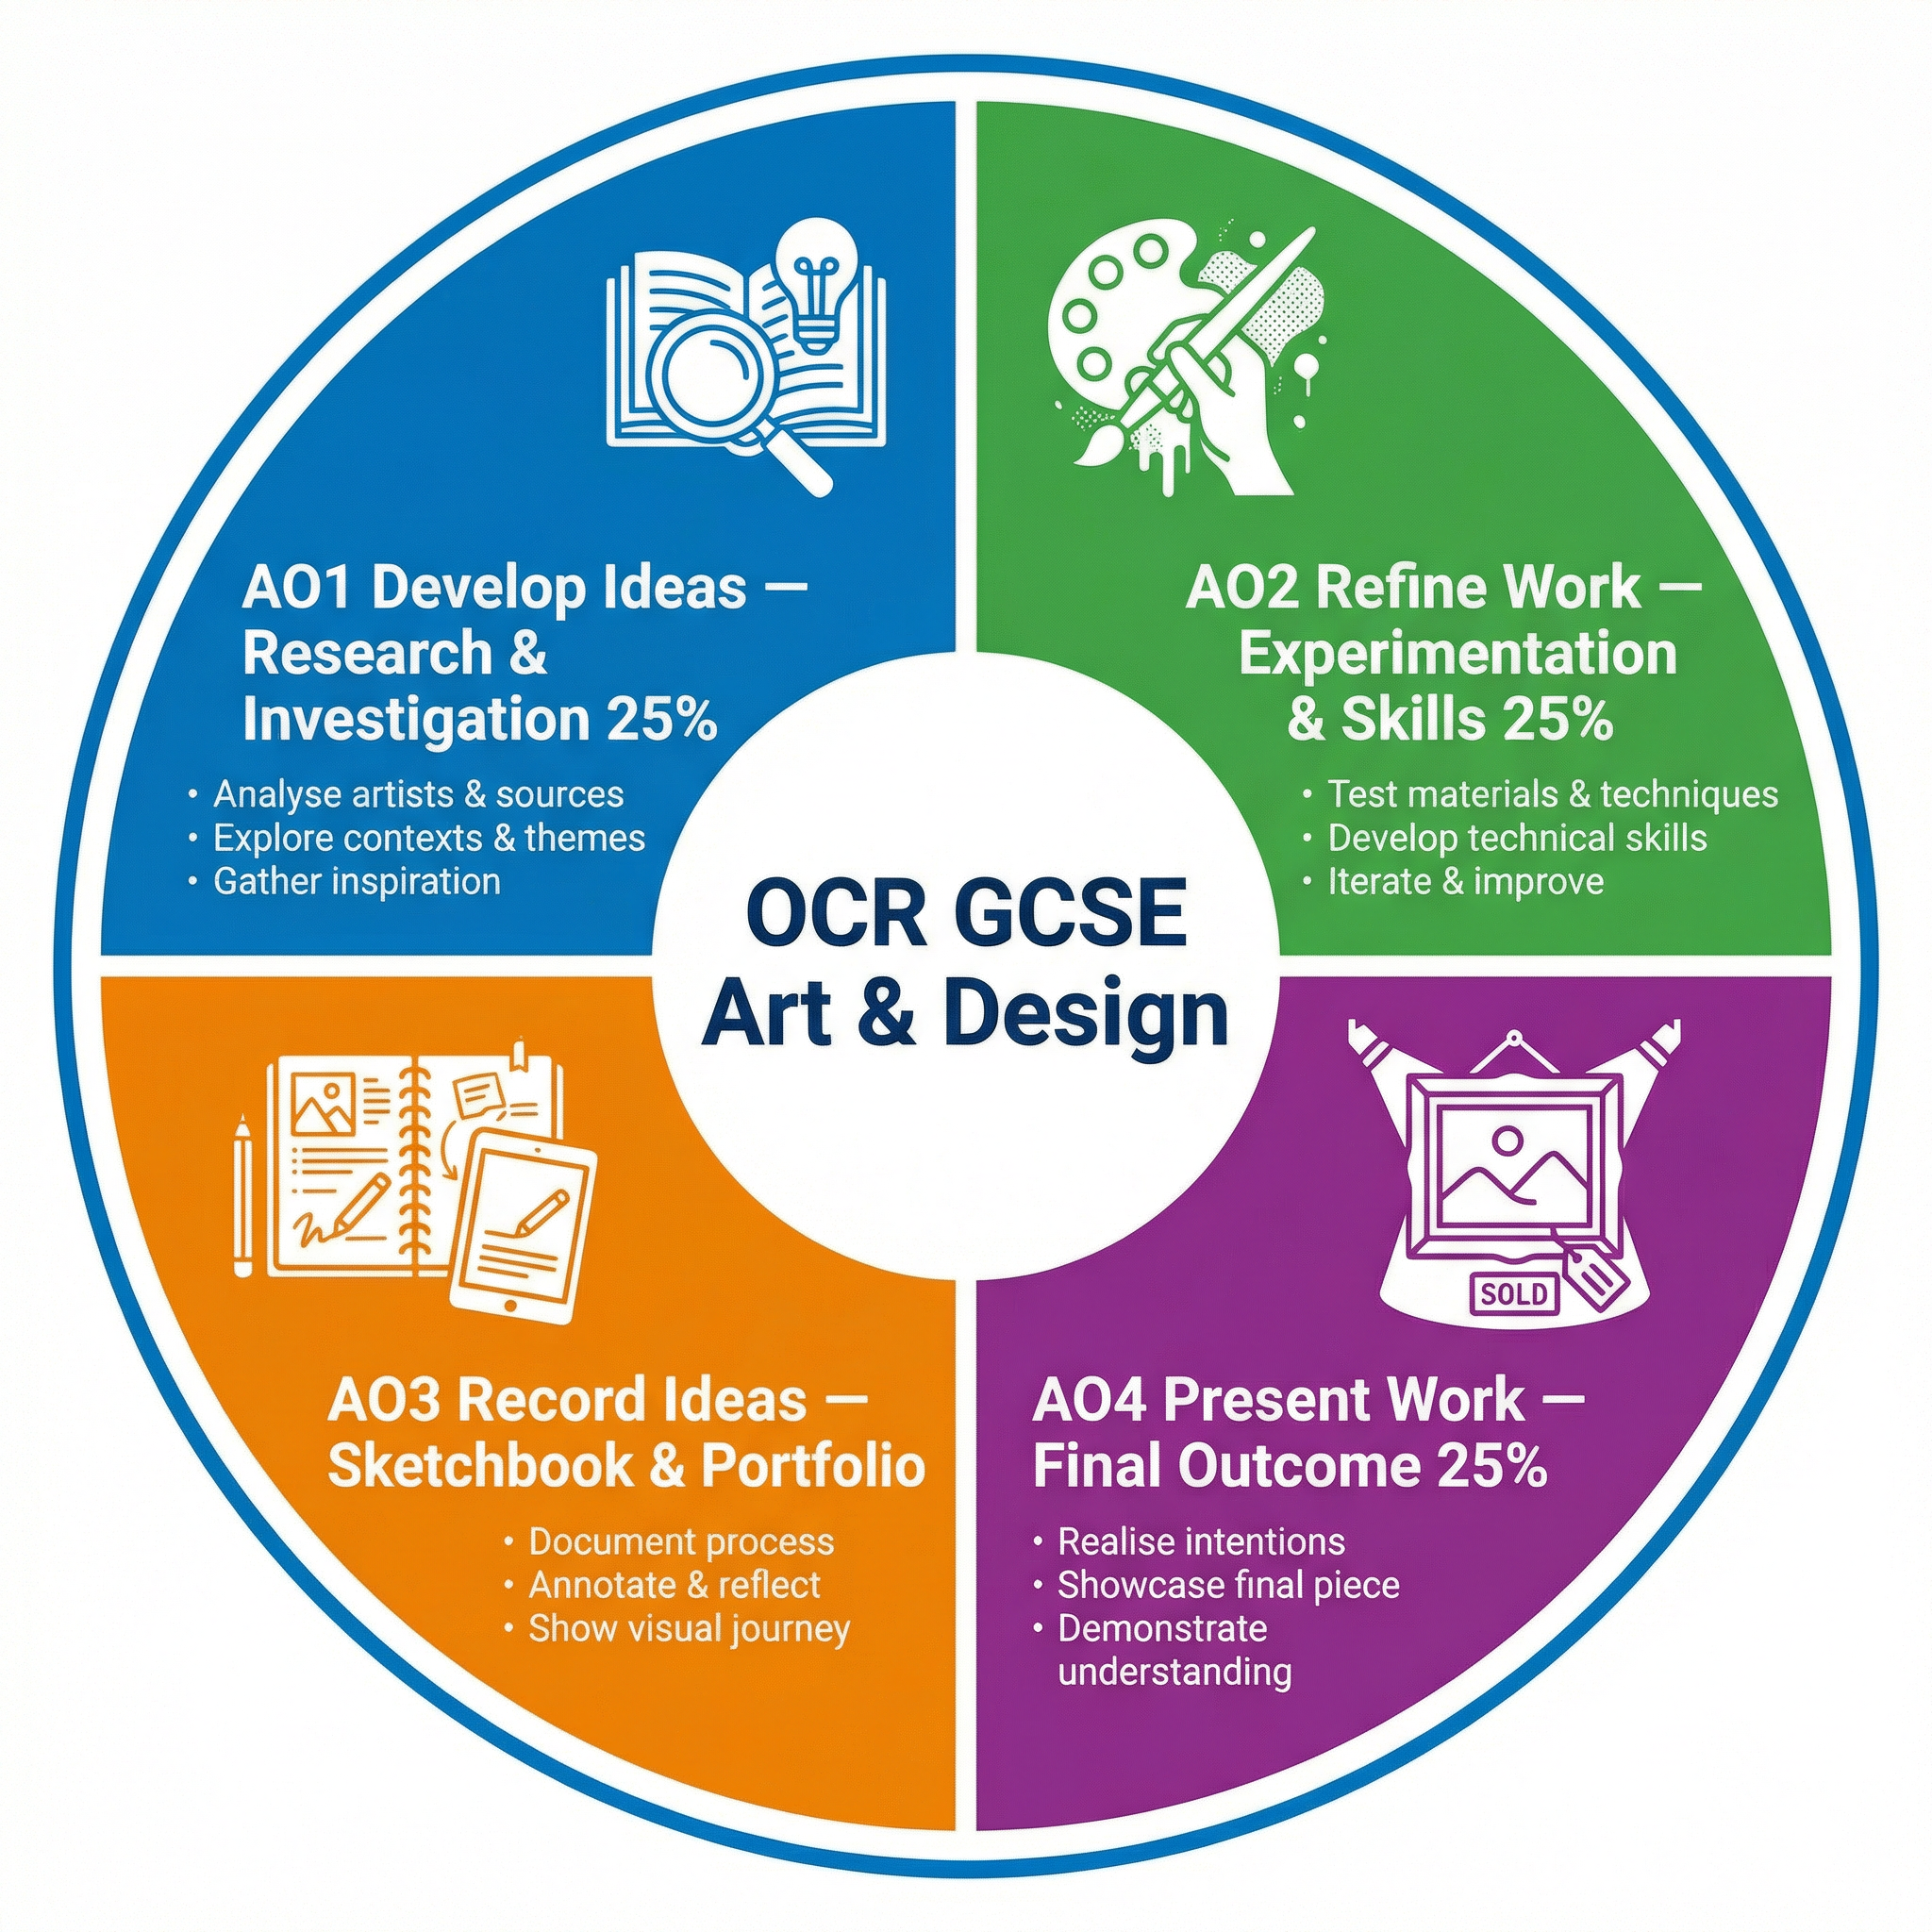
Now, before we go further, let's talk about the four Assessment Objectives, because everything you do in this course is marked against these four criteria, each worth exactly 25% of your marks. AO1 is about Developing Ideas — this means your research, your investigation of artists and practitioners, and how that genuinely informs what you make. AO2 is about Refining Work — this is your experimentation, your technical skill development, and crucially, your ability to select and improve. AO3 is about Recording Ideas — your sketchbook, your annotations, your visual diary of the whole process. And AO4 is about Presenting a Personal Response — your final outcome, where everything comes together. Keep these four objectives in mind throughout everything we discuss today.
Let's move into the core concepts. When we talk about mixed media, we're talking about the deliberate combination of materials to create something that neither material could achieve alone. Think about what happens when you layer a watercolour wash over a collaged newspaper background — you get a visual conversation between the printed text and the fluid paint. Or imagine applying sand mixed into gesso as a base layer, then drawing over it with charcoal — the texture fights back against the charcoal, creating unpredictable, organic marks that feel raw and tactile. That tension between materials is what makes mixed media so powerful.
There are some key practitioners you absolutely must know for this topic. First up: Kurt Schwitters. Schwitters was a German artist working in the early twentieth century who pioneered what he called Merz — a form of collage and assemblage using found objects and everyday ephemera. Ticket stubs, wire, newspaper, fabric — he combined these to create works that commented on the fragmented nature of modern life. When you reference Schwitters in your sketchbook, don't just say "he used collage." Analyse how his material choices — the specific textures, the printed text, the worn surfaces — created layers of meaning about memory and society. That analytical depth is what earns you marks in AO1.
Next: Robert Rauschenberg. An American artist from the mid-twentieth century, Rauschenberg created what he called "Combines" — works that blurred the boundary between painting and sculpture by incorporating three-dimensional objects directly into painted canvases. He used screen printing, photography, paint, and found objects in the same work. His approach is incredibly relevant to mixed media because he thought deeply about how different materials interact — how a photographic image sits differently in a composition than a painted mark, and what that contrast communicates. Study his work "Monogram" or "Bed" and ask yourself: what does each material contribute that the others cannot?
A third practitioner worth knowing is Anselm Kiefer, a German Neo-Expressionist artist who uses extraordinarily heavy mixed media — lead, straw, ash, sand, and oil paint — to explore themes of history, mythology, and destruction. His work demonstrates something crucial: that your substrate, your base surface, must be strong enough to support the weight and chemistry of your chosen materials. Kiefer literally works on industrial-scale canvases reinforced to hold the physical weight of his materials. At GCSE level, this translates to a really practical point: if you're applying heavy materials like sand, PVA, or thick acrylic, you need a substrate of at least 300 gsm — ideally mounting board or canvas board — or your work will buckle and deteriorate.
Now let's talk about the practical skills and techniques you need to demonstrate. The first and most important is understanding material compatibility. Not all materials play nicely together. Oil and water-based media, for example, have a complex relationship — you can use oil-based resist techniques deliberately, but you need to understand why the resist happens. Acrylic paint is water-based when wet but becomes water-resistant when dry, which means you can layer watercolour over dried acrylic but not the other way around without the watercolour beading off. Understanding these physical properties and being able to explain them in your annotations is exactly what earns you marks in AO2.
The second key skill is substrate preparation. Before you even think about applying mixed media layers, you need to prepare your surface. Gesso is your best friend here — it's a white primer that seals the surface, provides tooth for materials to adhere to, and can itself be mixed with sand, sawdust, or other materials to create textured grounds. Apply gesso in multiple thin layers, allowing each to dry, rather than one thick layer which can crack.
Third: adhesion and layering sequence. Think of your artwork like a geological cross-section — each layer has a relationship with the layers above and below it. As a general rule, work from thin to thick, and from water-based to oil-based. Collage elements should be adhered with PVA diluted roughly 50/50 with water, applied both beneath and over the collage piece to seal it. Allow each layer to dry fully before applying the next — patience is a genuine technical skill in mixed media.
Fourth: the role of mark-making within mixed media. Don't neglect drawing and mark-making as part of your mixed media work. Ink, graphite, charcoal, and pen can all be used to draw into, over, or around other materials, creating linear elements that contrast with the textural or painterly layers beneath. Rauschenberg used gestural brushwork directly over photographic screen prints — the contrast between the photographic precision and the painterly spontaneity was entirely intentional.
Now, let's talk about your portfolio and sketchbook, because this is where so many candidates lose marks unnecessarily. Your sketchbook is not just a place to stick things in — it's a visual argument. Every page should tell the story of your thinking. When you experiment with a new material combination, don't just show the result — annotate it analytically. Instead of writing "I used sand and PVA glue," write something like: "I mixed fine sand into PVA to create a granular impasto ground. The resulting texture evokes the eroded surfaces of ancient stonework, which connects directly to my theme of time and decay. I found that the mixture required a ratio of approximately 2 parts PVA to 1 part sand for optimal adhesion — a higher sand ratio caused the surface to crumble once dry." Do you see the difference? That second annotation demonstrates technical understanding, thematic connection, and evidence of refinement — it hits AO2 and AO3 simultaneously.
One crucial piece of advice: photograph everything. Mixed media works can be fragile, and some experiments may deteriorate or be destroyed in the process of making. The photograph is your evidence. If you create a beautiful wax resist experiment that then gets torn or damaged, the photograph in your sketchbook is what the examiner sees. Date your photographs and annotate them with what you were testing and what you learned.
Right, let's get into exam tips and the most common mistakes I see candidates make. The number one mistake — and I cannot stress this enough — is the kitchen sink approach. This is where a candidate combines every material they can find without any clear reason. Glitter, tissue paper, magazine cuttings, acrylic paint, oil pastel, sand, string — all on the same page, with no thematic logic. Examiners call this "arbitrary juxtaposition" and it will not earn you marks in AO2 or AO4. Every material you choose must have a reason. Ask yourself: why this material? What does it contribute that no other material could? How does it connect to my theme?
The second major mistake is superficial artist research. Copying an artist's imagery is not analysis. If you're referencing Schwitters, I don't want to see you making a collage that looks like a Schwitters — I want to see you analysing his technique and applying his principles to your own theme and imagery. The question to ask is: what did this artist understand about materials that I can apply to my own work?
Third mistake: descriptive annotation. "I used blue paint and stuck on some newspaper" — that's description. "The blue acrylic wash, applied over torn newsprint, creates a visual tension between the fluid, expressive paint and the rigid, text-heavy newspaper surface, suggesting the conflict between emotion and information that underpins my theme of media overload" — that's analysis. Always explain the why and the how, not just the what.
Fourth: ignoring substrate weight. If your paper is buckling, your portfolio looks unprofessional and your materials may not adhere properly. Use the right substrate for the job. For heavy mixed media, use mounting board, canvas board, or watercolour paper of at least 300 gsm.
Now for our quick-fire recall quiz — cover your notes and see how you do. Ready? Question one: Name two key practitioners associated with mixed media and collage, and state one key feature of each artist's approach. Question two: What does AO2 assess, and give one example of how you would demonstrate it in a mixed media sketchbook page. Question three: What is the term for the base surface of an artwork, and why does its weight in gsm matter for mixed media? Question four: Describe the difference between a descriptive annotation and an analytical annotation — give an example of each. Question five: What is the recommended layering sequence for mixed media — what should you apply first and why? Pause the podcast now and try to answer those from memory. The answers are all in this episode — go back and listen again if you need to.
So let's wrap up with a quick summary of the key points from today. Mixed media is about purposeful, intentional material combinations — not arbitrary juxtaposition. Know your key practitioners: Schwitters for collage and found materials, Rauschenberg for Combines and the dialogue between painting and photography, and Kiefer for heavy material and conceptual depth. Understand material compatibility and substrate weight — use at least 300 gsm for heavy applications. Your annotations must be analytical, not descriptive — always explain why and how, not just what. Photograph everything, especially fragile or transient experiments. And remember: every material choice must connect back to your theme.
That's it for today's episode of Art and Design Unlocked. You've got this — mixed media is one of the most expressive and personally rewarding areas of the entire course, and when you approach it with genuine curiosity and technical understanding, the results can be extraordinary. Good luck with your portfolio, keep experimenting, and I'll see you in the next episode.