Study Notes
Overview
Sculpture is a vital component of the OCR Art and Design specification, challenging candidates to think and work in three dimensions. This involves the skilful manipulation of volume, space, and form using a variety of materials and processes. A successful project demonstrates not just technical ability but also a sustained conceptual inquiry, where your practical work is deeply connected to your research into other artists and the world around you. This guide will equip you with the core knowledge and practical advice needed to create a compelling and high-scoring sculptural project.
Key Knowledge & Theory
Core Concepts
Understanding the fundamental principles of sculpture is essential for creating sophisticated work and for annotating your portfolio with confidence. Examiners look for evidence that you can articulate your ideas using the correct language.
- Form & Volume: Form refers to the three-dimensional nature of your work – its height, width, and depth. Volume is the space it occupies. Strong sculptural form has a sense of weight, mass, and presence.
- Space (Positive & Negative): Positive space is the material of the sculpture itself. Negative space is the empty space around and through your work. Artists like Barbara Hepworth and Henry Moore are masters of using negative space, making the voids as important as the solid forms. Credit is given for considering how your sculpture interacts with the space it inhabsits.
- Structure & Integrity: This refers to the stability of your sculpture. Can it support its own weight? Is it robust? Planning the internal structure (armature) is often critical, especially when working with materials like clay or plaster.
- Surface & Texture: The surface quality of your sculpture is a key expressive tool. Is it rough, smooth, polished, or textured? Your choice of surface should be deliberate and link to the overall concept of your work.
Key Practitioners/Artists/Composers
| Name | Period/Style | Key Works | Relevance |
|---|---|---|---|
| Auguste Rodin | 19th Century Realism/Impressionism | The Thinker, The Kiss | Master of capturing emotion and movement in the human form. His use of textured surfaces and the ‘non-finito’ (unfinished) style is a great reference for expressive clay work. |
| Barbara Hepworth | 20th Century Modernism/Abstract | Pierced Form, Single Form | Essential for understanding abstract sculpture, organic forms, and the relationship between landscape and sculpture. Her pioneering use of negative space is a key concept to explore. |
| Alberto Giacometti | 20th Century Surrealism/Existentialism | Walking Man I, Pointing Man | Known for his elongated, fragile figures that explore themes of isolation and the human condition. His heavily worked surfaces show a process of building up and scraping away. |
| Anthony Caro | 20th Century Modernism/Abstract | Early One Morning, Midday | A key figure in constructional sculpture. He used welded and bolted industrial materials like steel beams, placing them directly on the floor to challenge traditional ideas of presentation. |
| Rachel Whiteread | Contemporary (Turner Prize Winner) | House, Ghost | Casts the negative space of objects and architectural interiors. Her work provides a powerful conceptual approach to thinking about memory, absence, and the everyday object. |
Technical Vocabulary
Using this terminology correctly in your annotations will gain you credit for AO1.
- Maquette: A small-scale preliminary model or sketch for a sculpture.
- Armature: An internal framework or skeleton used to support a sculpture, typically made of wire or wood.
- Assemblage: A sculpture created by gathering and joining found objects.
- In the Round: A freestanding sculpture that is meant to be viewed from all sides.
- Relief: A sculptural technique where the sculpted elements remain attached to a solid background of the same material.
- Patina: A surface finish, often created by oxidation or chemicals, on a bronze or metal sculpture.
Practical Skills
Techniques & Processes
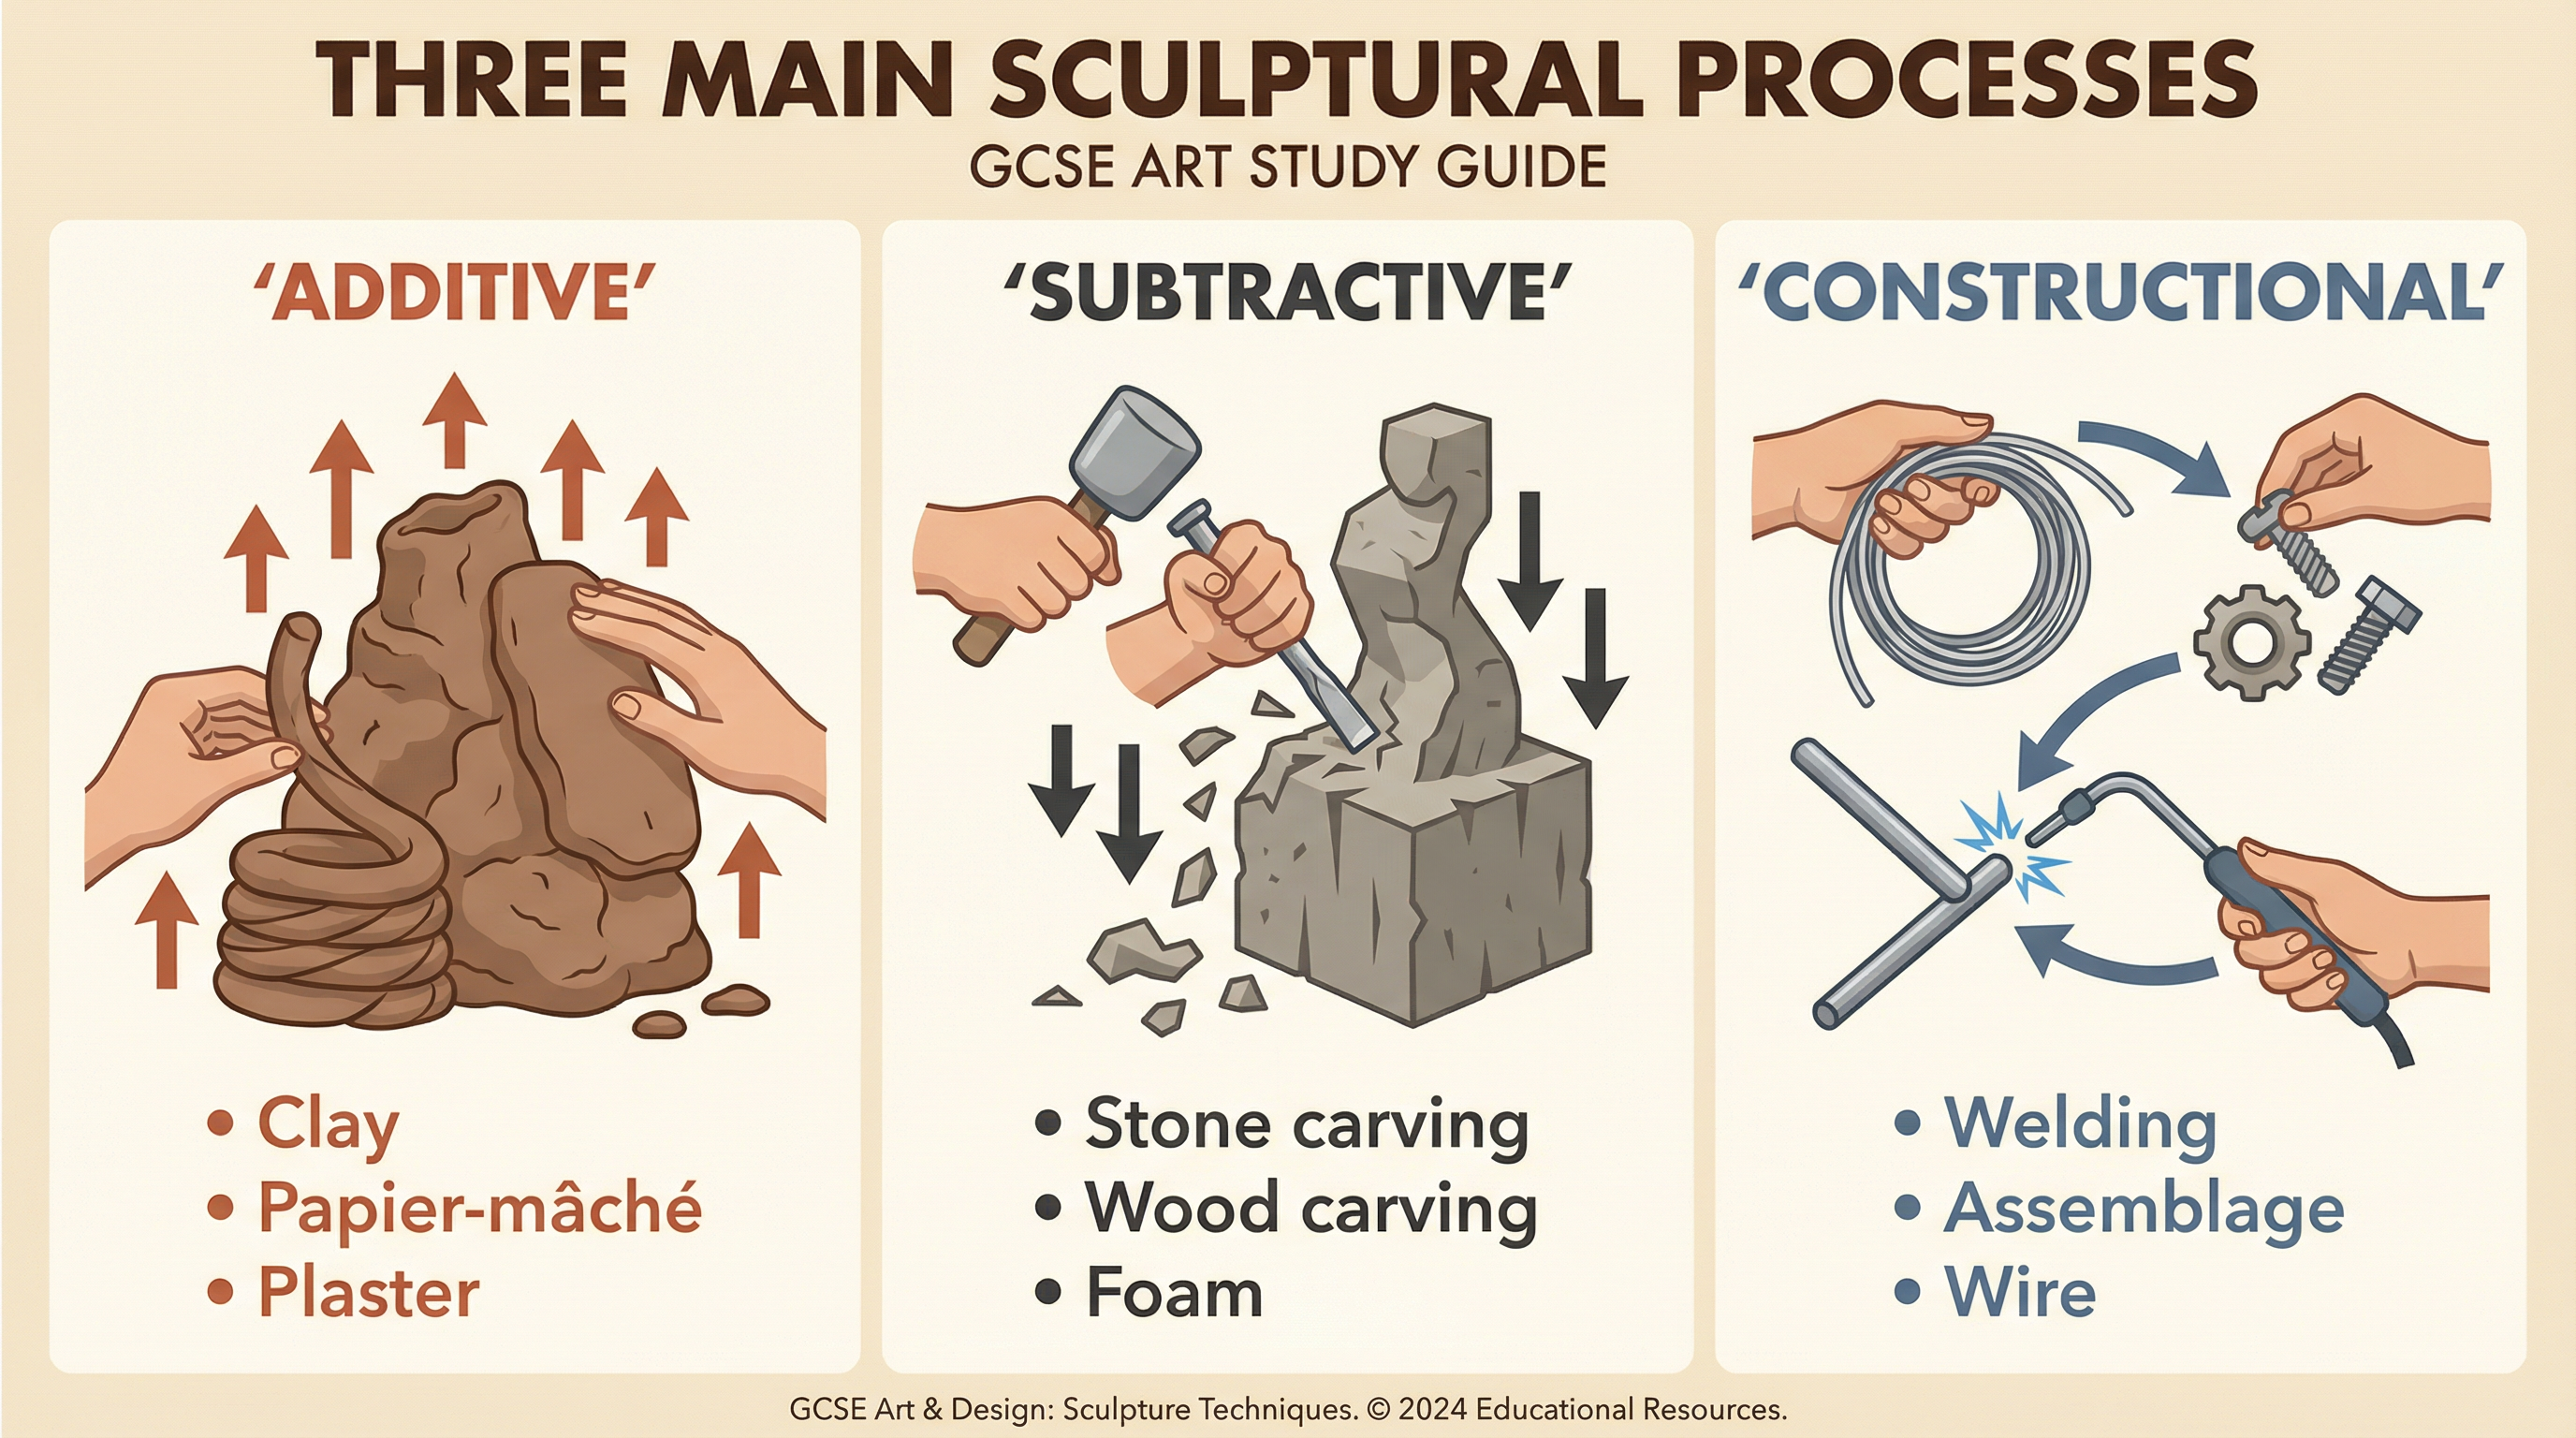
- Additive (Modelling): Start with an armature if your form is complex. Gradually add small pieces of clay, ensuring you press them firmly together to avoid air bubbles. Use a variety of modelling tools to shape and refine the surface. Keep the clay moist by wrapping it in a damp cloth and plastic bag between sessions.
- Subtractive (Carving): Begin with a clear plan, often drawing the intended form on all sides of your block (e.g., plaster, soap, foam). Use larger tools to remove the main bulk of unwanted material first, then switch to smaller, more precise tools for detailing. Always carve away from your body and wear safety goggles.
- Constructional (Joining): Experiment with different joining methods. For wire, this could be twisting, soldering, or using binding wire. For wood, it could be screws, dowels, or wood glue. For found objects, consider how you can physically connect them in a way that is both structurally sound and aesthetically considered.
Materials & Equipment
- Clay (Terracotta, Stoneware, Air-Drying): Understand the properties of your chosen clay. Terracotta is porous and earthy, stoneware is durable and vitreous when fired. Air-drying clay is convenient but less permanent.
- Plaster: Can be used for casting (in a mould) or for direct modelling over an armature (mod-roc). Always add plaster to water, never the other way around, to avoid lumps. Wear a dust mask when mixing.
- Wire (Aluminium, Steel): Aluminium wire is soft and malleable, ideal for initial ideas. Steel wire is stronger but harder to bend. Use appropriate pliers and wire cutters.
- Found Objects: Any object can become a sculptural material. Consider the history and symbolism of the objects you choose.
Portfolio/Coursework Guidance
Assessment Criteria
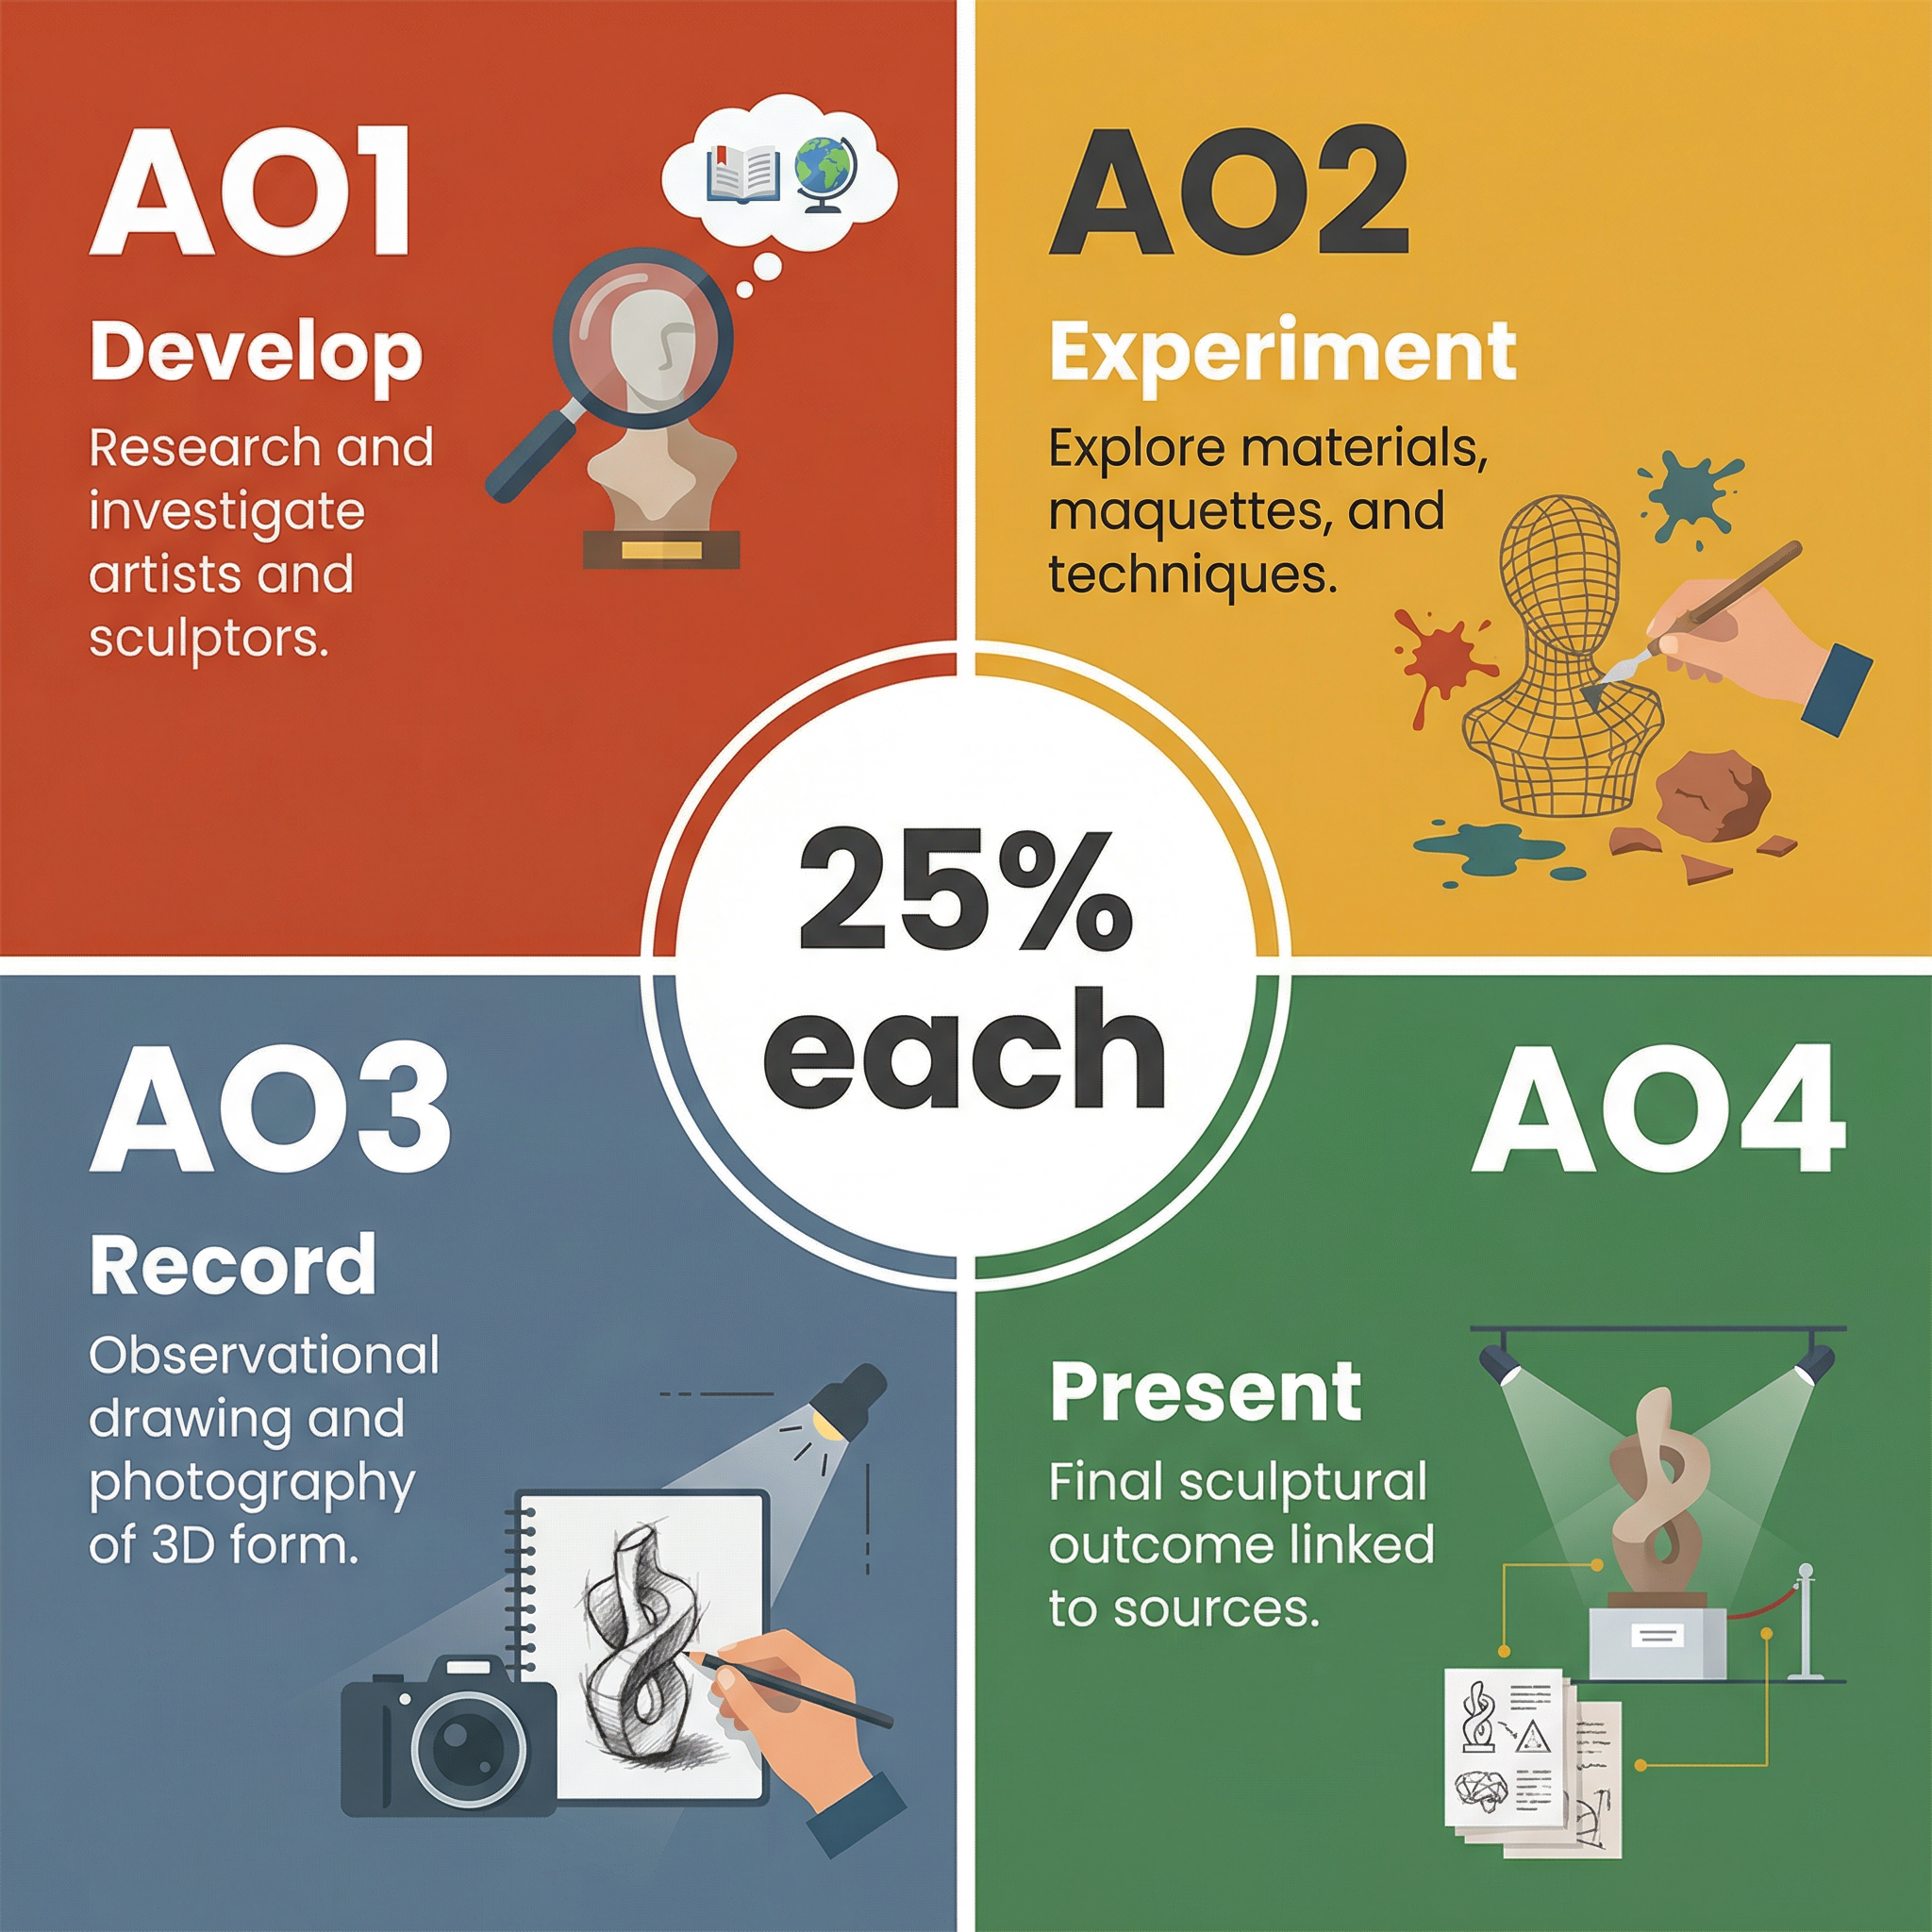
- AO1 (Develop): Show you have researched relevant artists. Your research must be analytical, not just descriptive. Explain HOW their work influences your own ideas.
- AO2 (Experiment): Evidence your journey. Show tests with different materials, processes, and compositions. Maquettes are crucial here. Annotate what you learned from each experiment.
- AO3 (Record): High-quality observational drawing and photography are essential. Draw objects from life, focusing on form and shadow. Photograph your own 3D work from multiple angles with good lighting to show it ‘in the round’.
- AO4 (Present): Your final piece should be a confident, personal, and meaningful response that is clearly connected to all the preparatory work in your portfolio.
Building a Strong Portfolio
- Tell a Story: Your portfolio should read like a visual diary, showing the evolution of your idea from initial concept to final resolution.
- Annotate with Purpose: Use annotation to explain your thinking. Why did you choose that material? What did you learn from that artist? How does this maquette solve a structural problem? Assume the examiner knows nothing about your project.
- Quality over Quantity: A few pages of in-depth, analytical research and meaningful experimentation are worth more than a whole sketchbook of superficial images.
Exam Component
Written Exam Knowledge
For the OCR Fine Art specification, there is no separate written exam. 100% of your mark comes from your portfolio and your Externally Set Task. Your ‘written’ component is the quality of your analytical annotation throughout your portfolio.
Practical Exam Preparation
- The Externally Set Task (EST): This is a 10-hour timed practical exam where you produce your final outcome. The theme is set by the exam board.
- Prep is Everything: All your research (AO1), experimentation (AO2), and recording (AO3) must be completed before the 10 hours begin. The 10 hours are purely for the realisation of your final piece (AO4).
- Time Plan: Break the 10 hours down into manageable stages. For example: Hours 1-2: Build armature and main forms. Hours 3-6: Refine form and add detail. Hours 7-8: Refine surface texture. Hours 9-10: Final touches, photography, and evaluation.